7.5 Upgrading MyID from a 32-bit application to 64-bit
From MyID 12.0.0, MyID Server is a 64-bit application. All previous versions of MyID were 32-bit, even when installed on 64-bit operating systems.
Accordingly, you cannot upgrade MyID from an earlier version to a 64-bit version by installing over the previous version; the file paths and registry settings have changed. You must back up your configuration, uninstall your previous version of MyID, retaining the database, install the 64-bit version, then restore your configuration to the 64-bit locations on the file system and in the registry.
The MyID Installation Assistant handles this process for you when you are upgrading from MyID 11; see section 7.4, Upgrading from MyID 11.
If you are upgrading from MyID 10 or earlier, Intercede has provided a utility that automates this process for you.
If you are upgrading to a new server, you must transfer the database and export the registry; see section 7.7, Upgrading to a new server.
Important: Check that you have carried out all of the prerequisite actions before beginning the upgrade installation process. See section 7.1, Before you upgrade for details.
Note: If you have customized JavaScript hooks in your installation, you must contact customer support quoting reference SUP-300 before you upgrade.
To upgrade from MyID 10 or earlier:
-
Take a copy of the list of the updates that have been applied to your system from the Installation History tab of the System Status report within MyID.
- Close all MyID clients.
-
Start up a single MyID client, log in to MyID, then log out again without accessing any workflows.
This ensures that the task numbers are cleared from the database.
-
Back up the MyID registry on the MyID servers.
This is:
HKEY_LOCAL_MACHINE\SOFTWARE\Wow6432Node\Intercede\
-
Back up the MyID database and program folder.
By default, the program folder is:
C:\Program Files (x86)\Intercede\
- Reboot the server.
-
Shut down all active MyID services.
-
In the Windows Services tool, locate each service running under one of the MyID accounts.
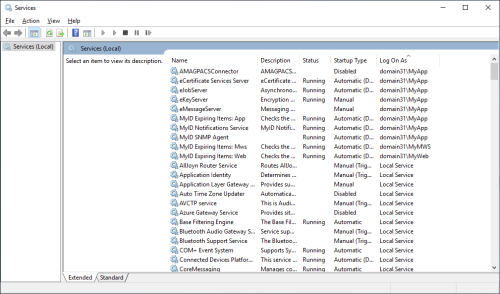
Note: You can sort the list of services by clicking the Log On As header.
-
Right-click the service, then from the pop-up menu select Stop.
-
-
Run the upgrade migration script to back up your configuration:
-
Log on to the server as the MyID installation user.
On a split tier system, you must run the script on both the application server and the web server.
-
Copy the Scripts folder from the following location in the MyID release image:
Support Tools\Upgrade\Upgrade Data Migration\
-
Right-click the UpgradeMigrate.bat file, then from the pop-up menu select Run as administrator.
Enter your administrator credentials if prompted.
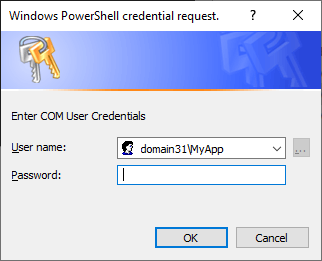
If you are running the script on the application server, the script then requests your MyID COM user credentials:
-
Type the password for the MyID COM user, then click OK.
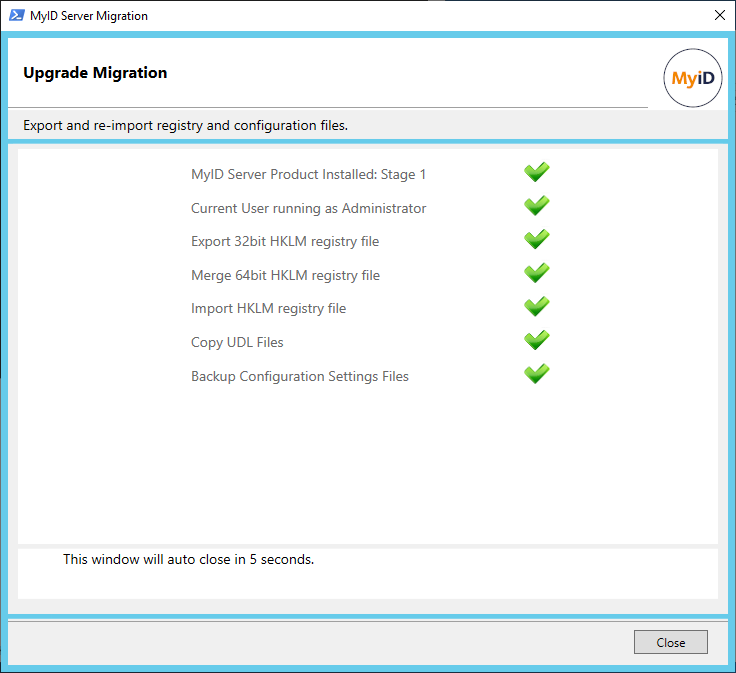
The MyID Server Migration screen appears, and displays its progress as it backs up your server configuration.

The information backed up depends on your system configuration; for example, in addition to the items in the screenshot, the script may also need to back up your HKCU area of the registry.
If there are any problems, you can display the log by clicking the provided link on screen.
-
Click Close, or wait for the dialog to close automatically five seconds after a successful run.
-
-
Uninstall any MyID patches, hotfixes, or modules.
You must uninstall the patches and modules in the reverse order in which they were applied. See the list of the updates that have been applied to your system that you obtained from the Installation History tab of the System Status report.
If you are asked to reboot at any point, do so.
Note: If you are uninstalling a MyID 10 system, you can used a set of PowerShell scripts that help remove existing patches. See the instructions in the following folder in the current MyID release image:
\Support Tools\Upgrade\v10 Patch Removal\
-
Uninstall MyID:
-
Using the Programs and Features option in the Windows Control Panel, uninstall the following item:
- MyID Server
-
If you have the following item in the list of Programs and Features, you must also uninstall the client components:
-
MyID Client Components x86
-
- Reboot the server.
-
If the MyID program folder still exists, make a backup, then remove it.
The easiest way to do this is to rename the folder.
-
-
On each client, you are recommended to uninstall the previous version of the MyID client software; for example, MyID Desktop, the Self-Service App
-
Install or upgrade any pre-requisites for the components you are going to be using.
See your integration guides for details.
Note: The configuration for your components may have changed for this version of MyID. Make sure you check the integration guides for the latest information.
-
Reboot the MyID server.
Note: If you do not reboot the MyID server before running the installation program for the latest version, you may see an error similar to the following:
Error 1303. The installer has insufficient privileges to access this directory: C:\Program Files\MyID\Components\Devices. The installation cannot continue.
If you see this error, click Cancel, ignore any errors that appear, then reboot the server. Make sure that MyID is not installed, then attempt to run the installation program for the latest version again.
-
Install the latest version of MyID using the MyID Installation Assistant.
See section 2, MyID Installation Assistant for details.
-
Once the installation has completed, run the upgrade migration script to restore your backed-up configuration:
-
Log on to the server as the MyID installation user.
On a split tier system, you must run the script on both the application server and the web server.
-
Right-click the UpgradeMigrate.bat file, then from the pop-up menu select Run as administrator.
Enter your administrator credentials if prompted.
If you are running the script on the application server, the script requests your MyID COM user credentials:
-
Type the password for the MyID COM user, then click OK.
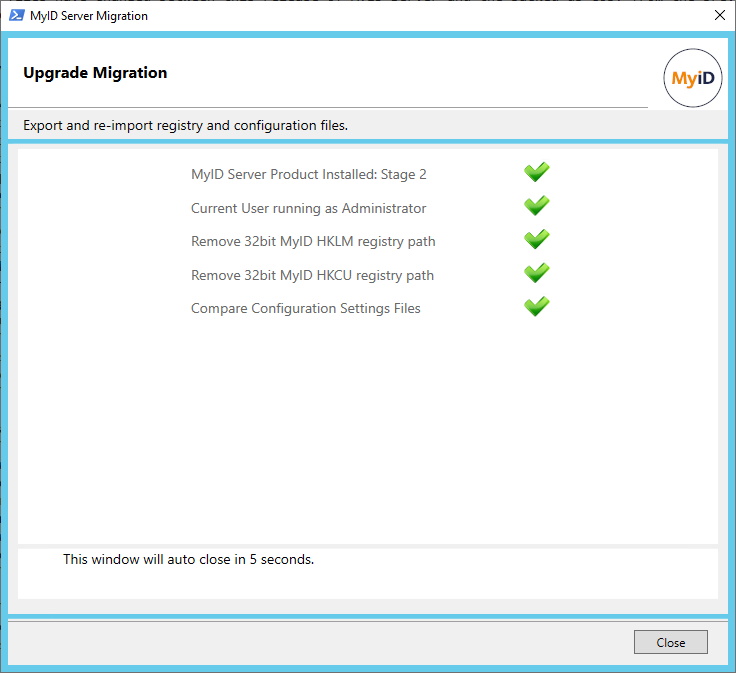
The MyID Server Migration screen appears, and displays its progress as it restores your server configuration.

-
Click Close, or wait for the dialog to close automatically five seconds after a successful run.
The configuration file change report appears:
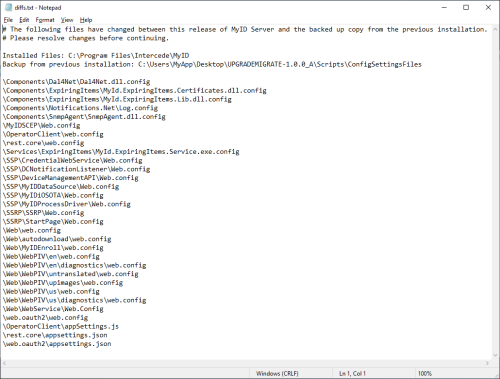
This report displays any differences between the configuration files from your previous system and the files installed by the current installation program.
-
Review the changes between the configuration files; if you have made any manual changes to the configuration files, you must implement them in the current versions of the files.
Note: Some changes in the configuration files may be the result of enhancements to MyID since your previous version was released. If you are unsure about any changes, contact customer support quoting reference SUP-342 for assistance.
-
-
Complete any required post-installation configuration changes to your system.
-
Install the 64-bit versions of any modules you previously had installed.
-
On each client:
-
Install the MyID client software; for example:
-
MyID Desktop
-
MyID Client Service for the MyID Operator Client
-
Self-Service App
-
Self-Service Kiosk
-
-
Clear the browsing history in the Windows Internet Options dialog.
Note: Make sure you deselect the Preserve Favorites website data option, if it is available.
You are recommended to upgrade the client software on each client. New features of the server software may require the latest client software.
-
-
Review your security settings.
For example, when you install MyID, the Security Officer PIN Type is set to Random rather than whatever it was set to previously – make sure that this suits the security requirements of your system.
See the System Security Checklist for details.
-
Follow the instructions for configuring MyID after you complete the upgrade.